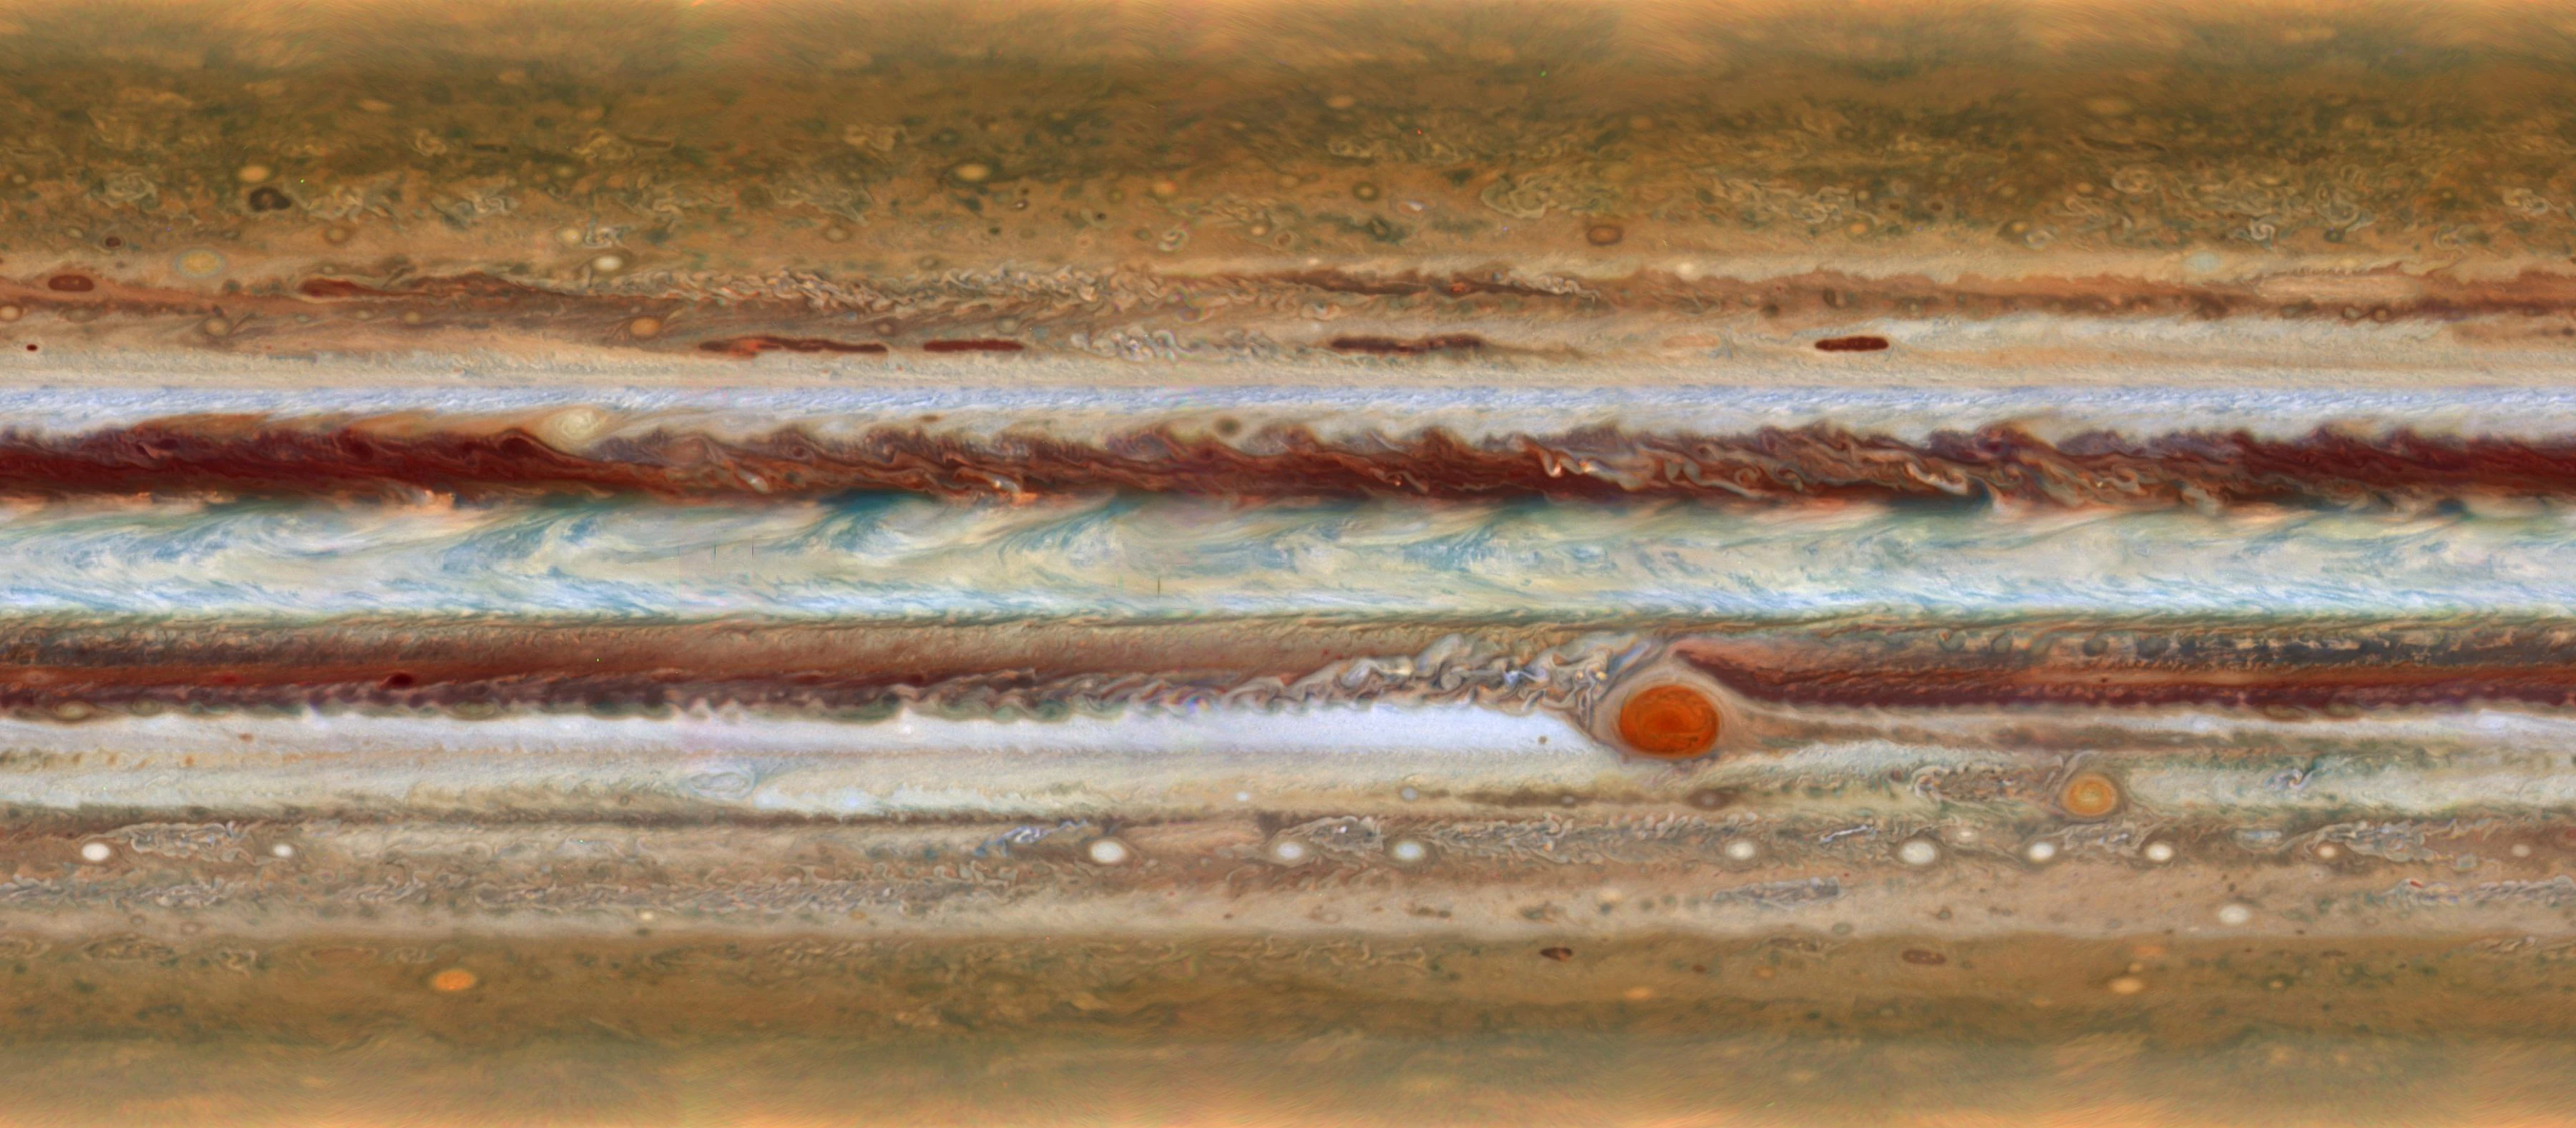
Jupiter reaches opposition around 00:30 UT on February 11, 2027. That night its disc spans 45.2 arcseconds, it shines at apparent magnitude −2.55, and from Nicosia it crosses the meridian 70° up in Leo around local midnight (all figures from JPL Horizons). If you’ve been meaning to put a camera on your telescope for the planets, this is the season to do it. The planet is already 35.8″ across this week and above 55° before dawn.
The short version of this post: for a first planetary camera on a typical 6- to 8-inch Dobsonian, buy a colour camera with 2.9 µm pixels, like ZWO’s ASI662MC at $199, and a 2× or 2.5× Barlow. If you own an f/10 Schmidt-Cassegrain, the smaller-pixel ASI678MC at $299 fits it better without any Barlow. The rest of this post shows the arithmetic behind both picks, because the pairing between camera and scope decides more than the camera does.
Why a smart telescope won’t do this job
I’ll start with the camera most readers already have. A Seestar S50 has a 250 mm focal length and 2.9 µm pixels, which works out to 2.39″ per pixel. At opposition Jupiter covers about 19 of those pixels. The belts show, and on a steady night there’s a hint of the Great Red Spot, but that’s the ceiling. I made the same point in the Seestar S50 Pro comparison: smart telescopes have short focal lengths that suit nebulae and are the wrong shape for planets.
Planets need two things a smart telescope lacks. The first is aperture, because aperture sets the finest detail the optics can resolve. The Dawes limit, an empirical rule for the smallest separation a telescope can split, is about 116/D arcseconds with D in millimetres. That’s 0.77″ for a 150 mm scope and 0.58″ for my 200 mm Dob. The second is enough focal length to spread that detail over several pixels. A dedicated planetary camera on a real telescope supplies the pixels, and lucky imaging deals with the atmosphere.
Lucky imaging means recording a fast video of a few thousand frames and keeping only the sharpest few percent, the instants when the turbulent air above you happened to hold still. A planetary camera is a small, fast-readout video camera built for exactly this: low read noise, high frame rates, a 1.25-inch nosepiece that slides into the focuser in place of an eyepiece.
The one formula worth learning: f-ratio vs pixel size
Every planetary-camera decision comes back to one relationship. A telescope at focal ratio N, imaging at wavelength λ, can’t put detail finer than its diffraction cutoff onto the sensor. To capture all of it, the Nyquist sampling criterion says the pixel pitch p has to be no bigger than λN/2. Turned around:
critical f-ratio ≈ 2 × p / λ
At 550 nm (green, roughly mid-visual), that’s about 3.6 × the pixel size in microns. Imagers usually work a bit above that, and the common rule of thumb is f-ratio ≈ 5 × pixel size in µm for colour cameras. A colour sensor’s Bayer filter puts each colour on only some of the pixels, so it needs some extra margin.
Plugging in the cameras I looked at:
| Camera (ZWO store, Nov 3, 2026) | Pixel | Sensor resolution | Critical f-ratio (550 nm) | Rule-of-thumb f-ratio | Price |
|---|---|---|---|---|---|
| ASI662MC | 2.9 µm | 1920×1080 | f/10.5 | f/14.5 | $199 |
| ASI678MC | 2.0 µm | 3840×2160 | f/7.3 | f/10 | $299 |
| ASI224MC | 3.75 µm | 1304×976 | f/13.6 | f/19 | $149 (listed out of stock) |
The pixel size tells you how long a focal ratio you have to build, and that’s what you end up paying for in Barlows, focus travel and dimmer frames. Megapixels say very little here, because Jupiter only fills a small patch in the middle of the sensor.
Worked example: an 8-inch f/5.9 Dobsonian
My main visual scope is an 8-inch (200 mm) f/5.9 Dobsonian with a focal length of about 1,200 mm. It’s the same scope I collimate after every drive to Troodos. At its native f/5.9 it’s far too short for any planetary camera, so it needs a Barlow, a negative lens that multiplies the effective focal length. Here’s what each camera does behind one, with Jupiter at its opposition size:
| Setup | Effective f-ratio | Image scale | Jupiter across (Feb 11) | Field of view |
|---|---|---|---|---|
| ASI662MC + 2× Barlow | f/11.8 | 0.25″/pixel | ~180 px | 8.0′ × 4.5′ |
| ASI662MC + 2.5× Barlow | f/14.8 | 0.20″/pixel | ~225 px | 6.4′ × 3.6′ |
| ASI678MC + 2× Barlow | f/11.8 | 0.17″/pixel | ~265 px | 11.0′ × 6.2′ |
With a 2.5× Barlow the 662 sits right on its f/14.5 rule of thumb, and a 2× puts it between the critical value and the rule. On this scope the 678 with a 2× is already about 18% past its own f/10 target, which is mildly oversampled. That’s survivable, but it buys nothing, because the extra pixels are slicing up blur the 200 mm mirror can’t resolve anyway.
A Barlow’s real magnification also grows as the camera sits further behind it. Don’t trust the number on the barrel. Measure Jupiter’s width in pixels on your first night, divide the planet’s known angular size by that, and you have your true image scale.
The 2-minute clock: Jupiter rotates under you
Jupiter turns once in about 9 hours 55 minutes. That’s fast for a planet 45″ wide, and it puts a hard limit on how long one capture can run. A feature at the centre of the disc moves at π × 45.2″ over 595.5 minutes, which is 0.24″ per minute. At 0.25″ per pixel that’s about one pixel of smear every minute.
My Dob’s Dawes limit is 0.58″, and smear reaches half of that in about 1.2 minutes and all of it in about 2.4 minutes. So I’ll keep individual videos to 90–120 seconds. If you want to stack several videos or combine colour channels shot minutes apart, WinJUPOS (free) can de-rotate them. It projects each frame back onto a model of the rotating globe, so 10–15 minutes of data can be combined without smearing. It’s a second-month skill; your first night has enough going on.
This is also where frame rate earns its keep. ZWO lists the 662MC at 107.6 frames per second at full 1920×1080 resolution, which is roughly 9,700 frames in a 90-second video. The 678MC is listed at 47.5 fps at full 4K, about 4,300 frames in the same time. More frames in the window means more lucky ones to keep. Both cameras run faster on a cropped region of interest (ROI), but on my scope that comes with a catch.
Imaging from an undriven Dob
My Dob has no tracking. Jupiter’s declination at opposition is +15.3°, so it drifts across the sky at about 14.5″ per second. With the 662 and a 2× Barlow, the 8.0′ long axis of the frame gives me about 30 seconds before the planet slides off the edge. Across the 4.5′ short axis it’s about 15 seconds. The 678’s bigger sensor stretches that to about 42 seconds along its long axis.
The workaround is unglamorous. Rotate the camera in the focuser so the drift runs along the long axis of the sensor. Park Jupiter at the leading edge, let it cross, and nudge it back. AutoStakkert! (below) aligns every frame on the planet, so a drifting target stacks fine; what hurts is the vibration from each nudge, and you’ll throw those frames away anyway. You can’t use a small ROI to boost frame rate, because the planet would leave a 640×480 crop in a few seconds. This is where the 662’s 107 fps at full frame pays off on an undriven scope.
On this scope, tracking would improve my results more than any camera upgrade. An equatorial platform under the Dob, or a GoTo/tracking mount, turns this from a juggling act into a normal capture. If you’re choosing between a $299 camera and a $199 camera plus money toward tracking, take the second option.
Full-frame capture also eats disk space. An 8-bit frame from the 662 is about 2.1 MB, so a 90-second full-frame video is about 20 GB. The 678 at 4K is about 8.3 MB per frame and around 35 GB for the same 90 seconds. You’ll want a laptop with a USB 3.0 port and a fast SSD with a few hundred gigabytes free.
Which camera to buy
Buy the ASI662MC ($199) if you have a Newtonian or Dobsonian between f/4.5 and f/6, or a Maksutov around f/12–f/15. On the Newtonian, add a 2× or 2.5× Barlow. On the Maksutov, the 662 already lands close to its f/14.5 target with no Barlow at all, which keeps the optical train short and the image bright. ZWO lists it with 0.8 e⁻ read noise, a 38.2 ke⁻ full well and 91% peak QE (quantum efficiency, the fraction of photons converted to signal); those are the manufacturer’s figures, and I haven’t measured them.
Buy the ASI678MC ($299) if you have an f/10 Schmidt-Cassegrain. An 8-inch SCT at f/10 has a 2,032 mm focal length, and the 678’s 2.0 µm pixels put it at 0.20″ per pixel there, right on the f/10 rule of thumb with no Barlow. Jupiter at opposition comes out about 220 px across. ZWO’s own listed figures for the 678 are less flattering in other ways: an 11.27 ke⁻ full well and 83% QE, against the 662’s 38.2 ke⁻ and 91%.
I’d pass on the ASI224MC. It was the default beginner camera for years, but its 3.75 µm pixels want about f/19, and ZWO’s store listed it as out of stock when I checked. Cooled cameras like the ASI585MC Pro ($599) are wasted money for this job too. Cooling reduces thermal noise in long deep-sky exposures, and planetary frames are a few milliseconds long, so there’s no thermal noise to remove.
Stay with colour (the “MC” models) for your first season. The monochrome 662MM ($299) plus a filter wheel and RGB filters can produce sharper results, but you’ll be shooting three channels against the 2-minute rotation clock. ZWO also sells 662MC bundles with an 850 nm infrared-pass filter ($228) and a methane-band filter ($298). Both are good second-year tools: infrared light is bent less by turbulence, and methane absorption picks out high-altitude haze. You don’t need either to start.
The rest of the kit
- A 2× or 2.5× Barlow if you’re on a fast Newtonian. A decent 1.25-inch one is enough in year one.
- A UV/IR-cut filter in front of a colour camera, unless its window already blocks infrared. Colour planetary sensors respond well into the near-infrared, and that out-of-focus red light softens the image and skews the colour balance.
- Capture software: FireCapture (free) or SharpCap. Keep exposures short (a few milliseconds), raise the gain until the histogram sits around two-thirds full, and leave gamma at default.
- AutoStakkert! (free) for stacking. Start with the best 10–25% of frames.
- Wavelet sharpening in RegiStax (free). Go easy, because over-sharpened Jupiters grow a hard bright rim and orange-peel noise.
- Good collimation and a cooled-down mirror. A planetary camera shows every collimation error, and tube currents off a warm mirror look exactly like bad seeing. Collimate on a star at high power and give the mirror an hour outside first; on a Cyprus balcony that hour is easier to find in January than in August.
When to start
Don’t wait for February. From Nicosia (all times EET, UTC+2):
- Now, early November: Jupiter rises around local midnight and is 59° up by 05:00, still in astronomical twilight before sunrise. That’s a good time to learn the software at 36″ disc size.
- Mid-December: about 67° up at 04:00 local.
- Mid-January: above 40° from about 23:00 local and 68° at 02:00.
- Around February 11: above 40° from about 20:40 local and 70° at midnight, 45.2″ across.
Altitude is a real advantage at Cyprus latitudes. At 35°N, Jupiter transits 70° up at opposition. Imagers around 52°N, in London or Berlin, get about 53°. The air works like a weak prism, lifting blue light slightly more than red, so the planet gets a blue fringe on its upper edge and a red one on its lower edge. That spread scales roughly with the tangent of the zenith angle: tan 37° against tan 20°, so about twice as large at 53° as at 70°. That’s where an atmospheric dispersion corrector (ADC) starts paying for itself. Down here I’ll skip one for this apparition and let the software line up the colour channels.
If you’ve followed my Saturn aperture guide and already own a 6- or 8-inch scope, a $199 camera, a Barlow and a free software stack are all that stand between you and your own Jupiter with the Great Red Spot. Practise on the pre-dawn planet now, while mistakes are cheap and the opposition is still three months out.